


Click or scroll to zoom
Tap or pinch to zoom
Click or scroll to zoom
Tap or pinch to zoom
Click or scroll to zoom
Tap or pinch to zoom
Click or scroll to zoom
Tap or pinch to zoom

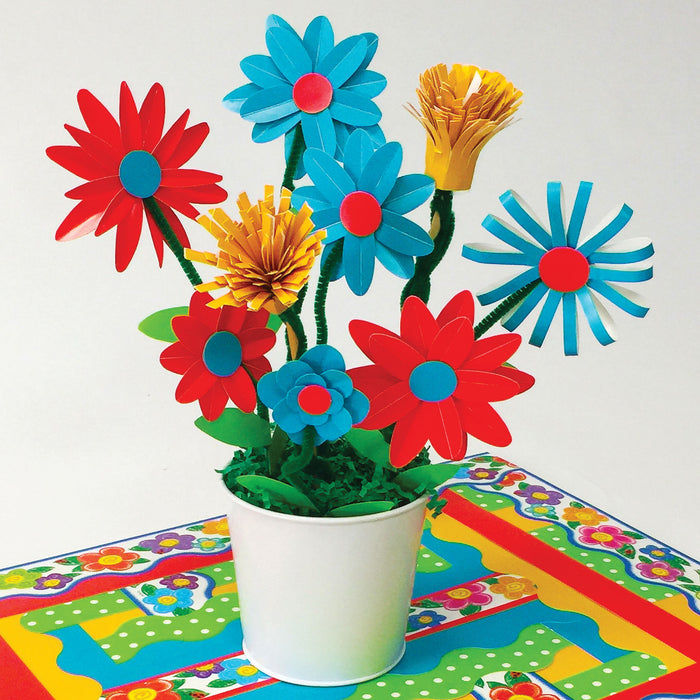
Poppin' Petals Spring Bouquet DIY
DIY
$0.00
SKU DIY141
Create your own cute and colorful paper flowers to celebrate spring. DIY paper flowers make bright and welcoming spring decorations in classrooms, homeschools, homes, and care facilities.
Supplies
- Sky Blue Terrific Trimmers® T92378
- Yellow Terrific Trimmers® T9876
- Coral Terrific Trimmers® T92376
- Green Terrific Trimmers® T9875
- Green chenille stems
- Wooden dowel
- Double-sided tape or foam tape and glue
- Vase or bucket and crinkle-cut paper for displaying (optional)
Directions
Mix and match bright colors and flower design ideas to create your own unique paper flower decorations!
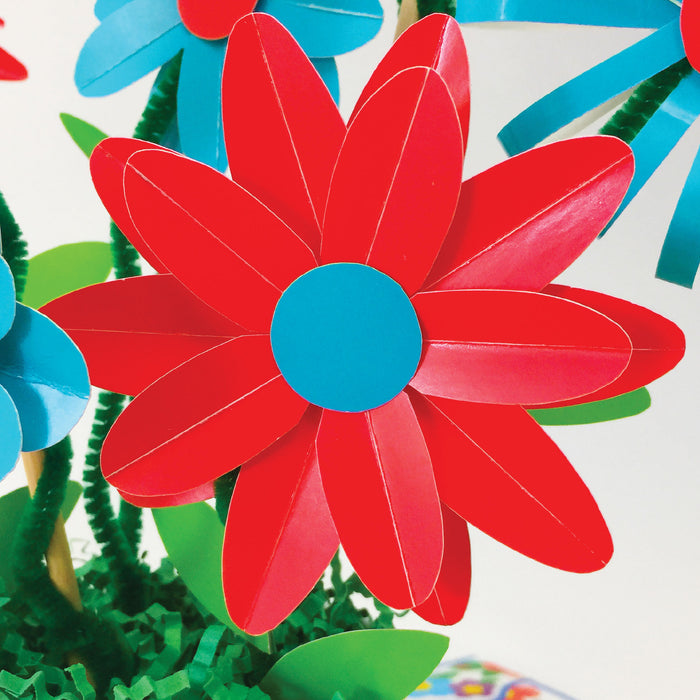
Blue & Coral "daisy-like" flowers:
- Cut 15 petals in three sizes (about 1/4-inch difference between sizes). The longest petal we used was 2¼ inches long. Fold all petals in half and crease to give them dimension.
- Cut two 1-inch circles from a trimmer that is a different color than the petals (one is for the flower center and one for the base).
- Lay one of the circles face down on the table for your flower base.
- Start with the longest petals you cut. Attach them to the white side of the circle base using double-stick or small pieces of foam tape. Work your way around the circle with the next two sizes of petals as well. Slightly overlap each layer to fill in any gaps between petals.
- Tape the other 1-inch circle to the front, center of your flower with the color facing out.
- Create a flower stem out of a chenille stem and stick it into the bottom of your flower (slide between petals and center circle). Tape or glue the stem in place.
- Cut leaf shapes out of green trimmers. Wrap each leaf partially to the chenille stem and attach with double-sided tape or glue.
- These basic steps can be used to make a variety of flowers. Create flowers in different widths and lengths, and cut your petals into different shapes too. You may need to adjust the number of petals for each layer (less for wider petals, more for thinner, and so on). Have fun!
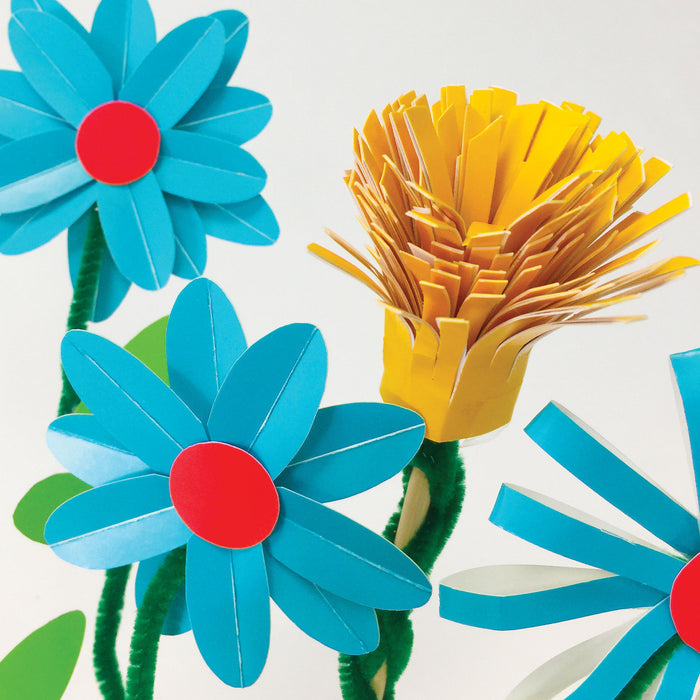
Yellow Flowers:
- The yellow, spikey flowers we created are perfect for adding dramatic flair to any paper flower arrangement.
- Fold a yellow trimmer in half matching up the scallops. Tape together with double-sided tape along the bottom ¼-inch of the straight edge.
- Cut small slits in the trimmer starting on the scalloped side. Stop each slit approximately ¼-inch from the bottom (up to, but not through, the taped edge).
- Next, roll the trimmer around a wooden dowel (tape or glue the dowel to the trimmer). Overlap the end and tape to secure. Fluff and pull apart the fringed flower petals.
- Wrap green chenille stems around the wooden dowel to cover it and add leaves if you'd like.
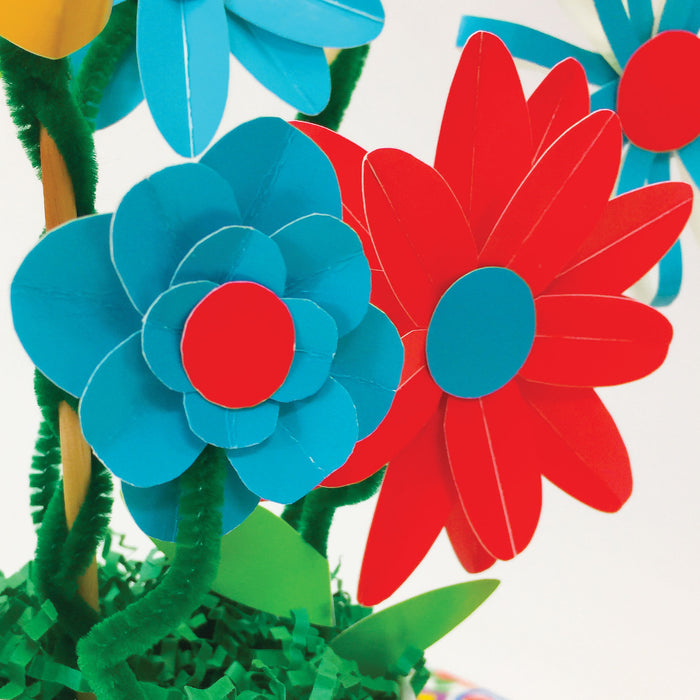
Blue Looped Flowers:
- Cut 14 trimmer strips to ¼-inch x 3¾-inches.
- Glue the ends of each strip together to create small loops. Allow them to dry slightly.
- Cut two 1-inch circles (one flower center and one base) in a color different than the petals.
- Lay the base circle face down on the table. Arrange the petal loops around the base evenly with the ends to the center. Tape to hold in place.
- Place the second 1-inch circle on top of the looped petals, color facing out. Tape into place.
Create a variety of flower designs to fill your favorite vase or bucket with a beautiful springtime centerpiece. Flower bouquets make festive May Day baskets and Mother's Day presents too!
©TREND enterprises, Inc. 141
